Build a mailing list with Modlify and Remix

15 minutes with Modlify and Remix is all you need to start getting newsletter signups from your website.
This short tutorial will guide you through the process of using Modlify webhooks to collect email newsletter signups from your website. Once collected, you'll be able to use Modlify's powerful process and automation to turn those leads into customers.
We'd recommend you follow along with the guide to get the most out of it, but if you'd rather just read through then you'll find links to a Modlify template that matches what we're building, as well as a Github repository containing all the code.
What You Need
You don't need anything at all to start in Modlify, and neither do we (we don't even ask for your email address before letting you get started). When we build the Remix app we'll assume you have Node and npm available, and some basic knowledge of how they work.
Modlify setup
Our first step is to jump into a new Modlify workspace - you don't need to register, you can have an obligation-free sandbox to play with instantly. Once you're there, hit "Manage Workspace" -> "Datasets" and you'll see an option to create a new dataset.
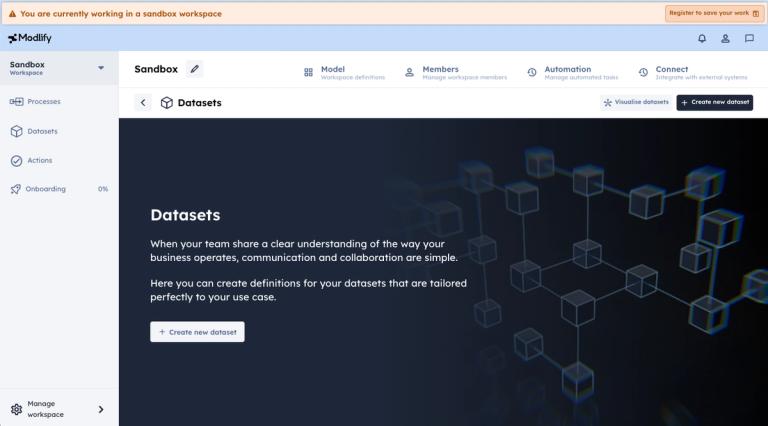
We're going to build a new dataset, so hit the button, then choose "Build from scratch". The plan is to make a really simple dataset with just one field - an email address. Of course there's no limit to what you could store alongside this - whatever you need for nurturing your leads, Modlify can do it.
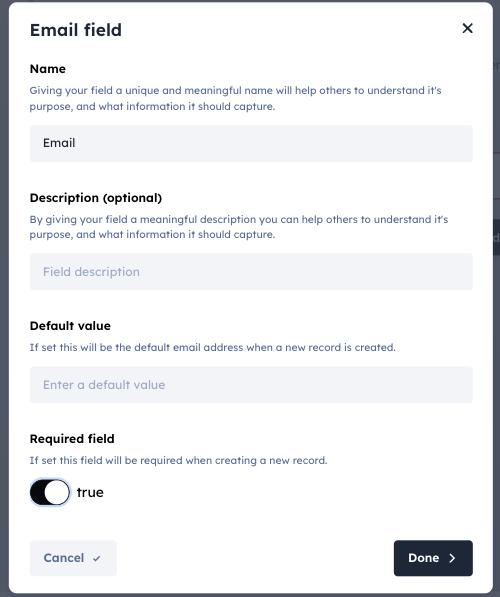
Once we're into the dataset modelling page, we'll go ahead an make an email field, and let's call it "Email" to keep things simple! While we're here, we'll mark it as required - our leads wouldn't be valid without an email address so this makes sense - but as always it's your choice to make.
Give your dataset a name (I chose "Signup"), and hit the save button. That's it - our dataset is finished, and we're ready to start storing some records.
We could use Modlify's intuitive UI to make some new records... but this tutorial is all about automation, so let's automate!
Head to the "Connect" tab, and hit "Webhooks", you'll see a big juicy "Create Webhook" button. But don't press it yet...
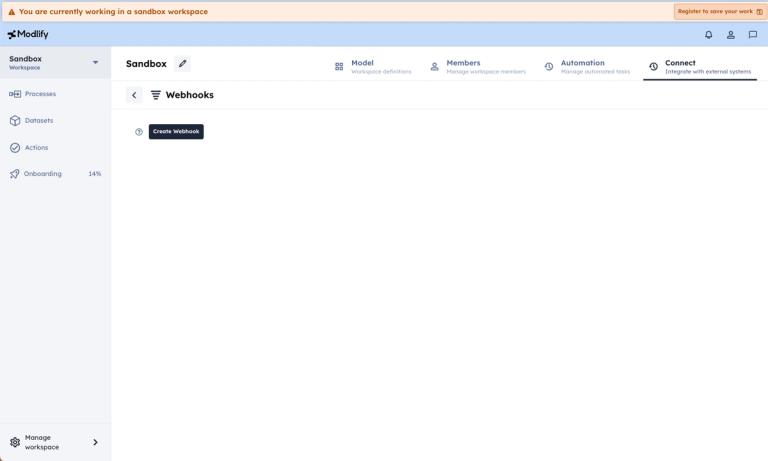
OK, now you can press it! And just like that, you'll see the tools you need to create a webhook. Let's give it a name first - "My website" will do the job - this is important because anything that happens as a result of triggering the webhook will show up in the app as being done by this name. We'll leave security signatures turned off for now - but in a production application you'll want to turn these on.
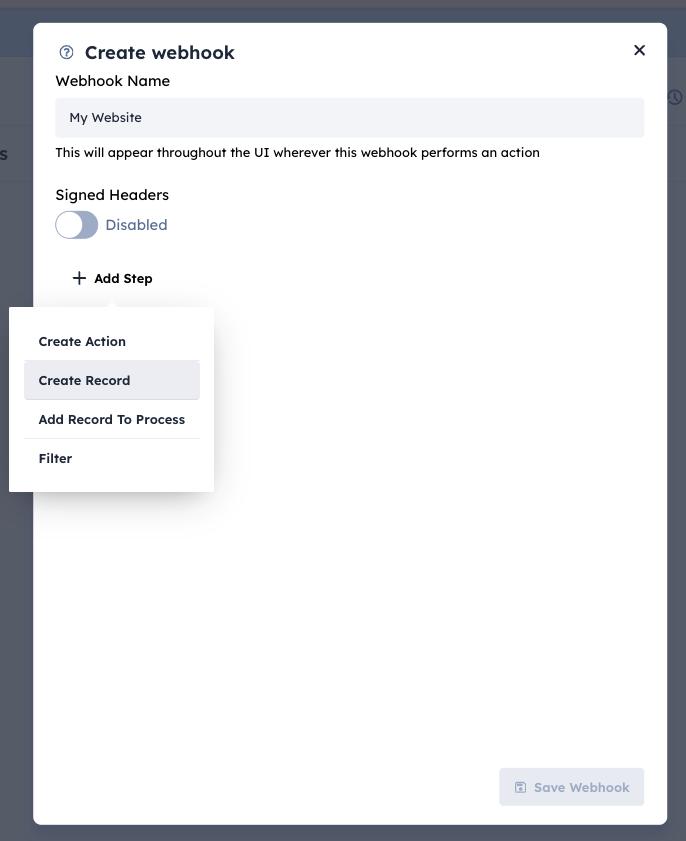
Next we need to define what will happen when our webhook is triggered - we want to create a record in our "Signup" dataset:
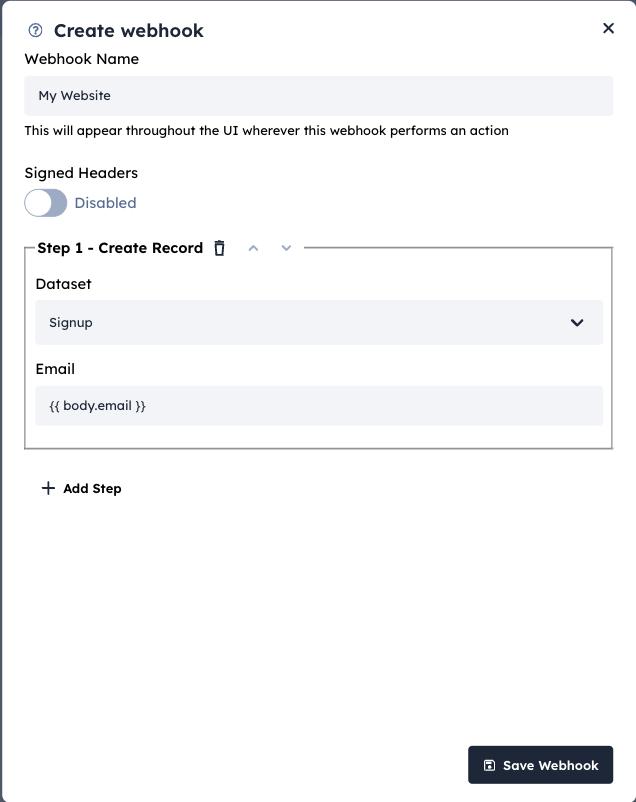
We'll select our "Signup" dataset from the dropdown that appears, and the email field we just defined is ready for us to fill in. We're going to send data to the webhook with an email property in the request body, so we'll set the email to `{{ body.email }}`. You can find more information on this templating syntax in our in-app help section.
When we save our webhook, we'll get a useful screen that shows us the URL, as well as a cURL command we can use to test it out from the command line. Why not grab that and try it out now? Once you're done, make a note of the URL and we'll get on to building our Remix app.
Sending data from our website
We're going to build a (really!) simple website to collect email signups using Remix. We'll use their bootstrap tool to get up and running (latest version when this article was written was 2.9.1)
npx create-remix@latestFollow the prompts and you should have basic Remix site templated out. Before we start it up, let's make a .env file, and add our webhook URL as an environment variable.
WEBHOOK_URL=https://webhooks.modlify.io/webhook/...We're ready to go! Run the dev command and open in your browser to make sure it works.
We're going to add a really simple new page, so make a file called "newsletter.tsx" under the "routes" directory. It will contain a function that renders a small and simple form.
export default function Newsletter() {
  return (
    <form method="post">
      <input type="email" name="email" placeholder="Email" />
      <button type="submit">Subscribe</button>
    </form>
  );
}
Head to your browser and go to /newsletter - you should see our basic form

Enter an email address and press submit - nothing will happen yet, so let's write an action to handle our form submission. The Remix docs have more information on exactly what this function can do, but it's relatively simple to follow along.
import { ActionFunctionArgs, json } from "@remix-run/node";

export const action = async ({ request }: ActionFunctionArgs) => {
  const form = await request.formData();

  const email = form.get("email");

  await fetch(process.env.WEBHOOK_URL!, {
    method: "POST",
    body: JSON.stringify({ email }),
  });

  return json({ email });
};
Go back to your browser, enter your email address and hit Subscribe. If you head over to your Modlify workspace, you'll now see your first newsletter signup - direct from your website to Modlify.
What next?
- Create a nurture process in your workspace, and use the webhook to add new records
- Use the Modlify Slack integration to get notified whenever someone signs up
- Invite your team members, and assign actions in the process to the right person
Resources
All the code in this tutorial can be found on our Github.
Use the tutorial template in Modlify to get started
